Host Static Website on GitHub Pages with SSL and WWW redirect
You may know that you can host a static site on GitHub pages - but what if you want to have a www redirect and also SSL? This isn’t that hard until you get to the www redirect. That would require a subdomain and a second SSL cert, which they don’t provide.
So, let me demonstrate how we can use GitHub Pages and Cloudflare to host your free GitHub pages website with SSL and www removal/redirect.
In this example I’m going to focus on morebetterfaster.io - but this is basically the same setup for aaronsaray.com - except instead of using flat HTML and the gh-pages plugin, I use jekyll.
Register Domain
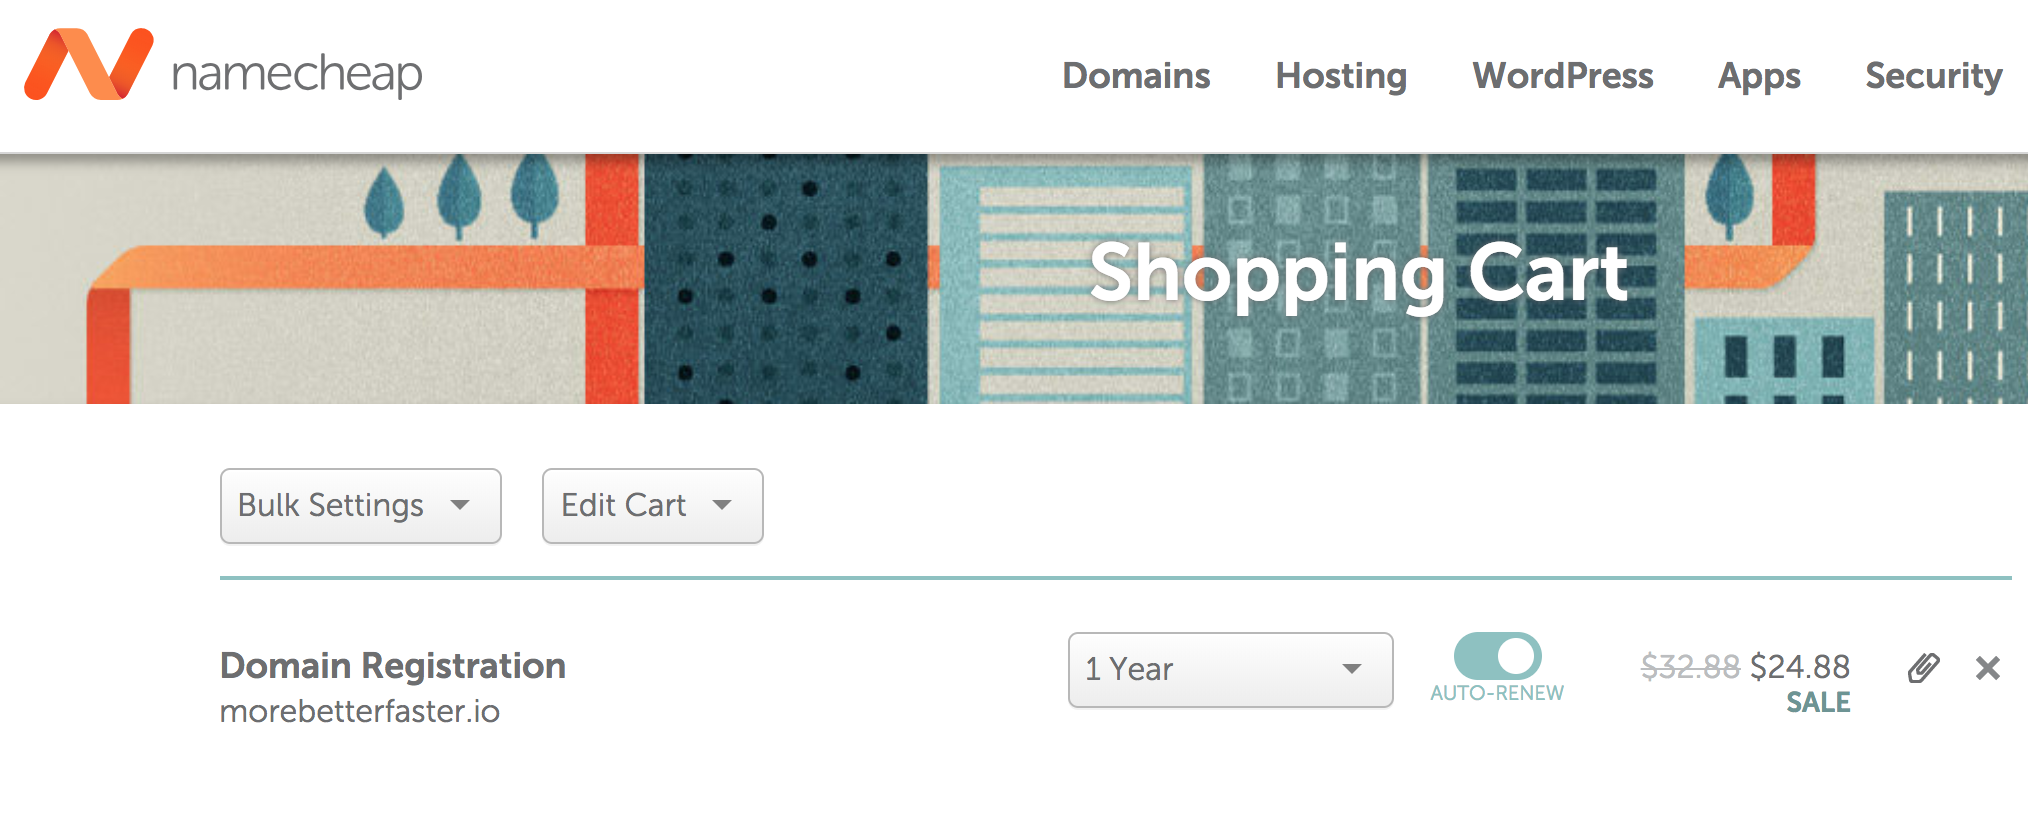
First of all, I recommend NameCheap for domains. I’m not an affiliate, so I won’t get a commission either. Just look into their history - they’re pretty great. Anyway, register your domain to get started. You’ll be coming back to this later.
Set Up a Cloudflare Account
Run over to Cloudflare and set up a free account.
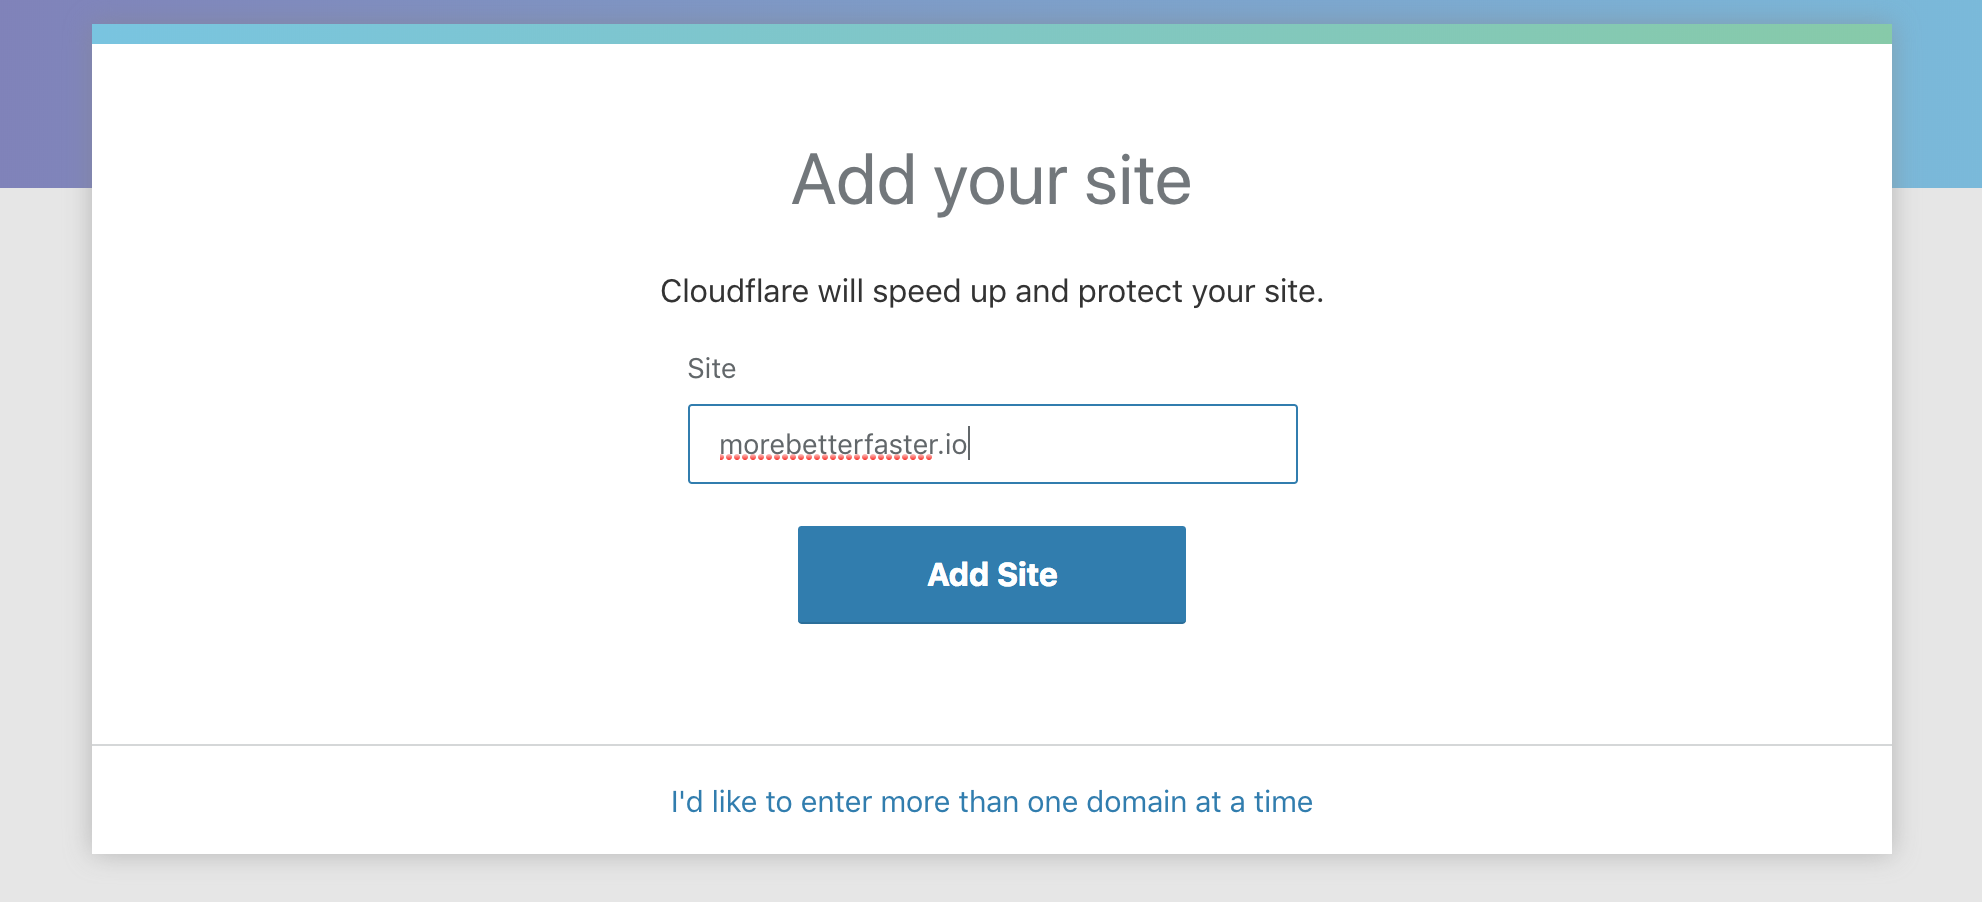
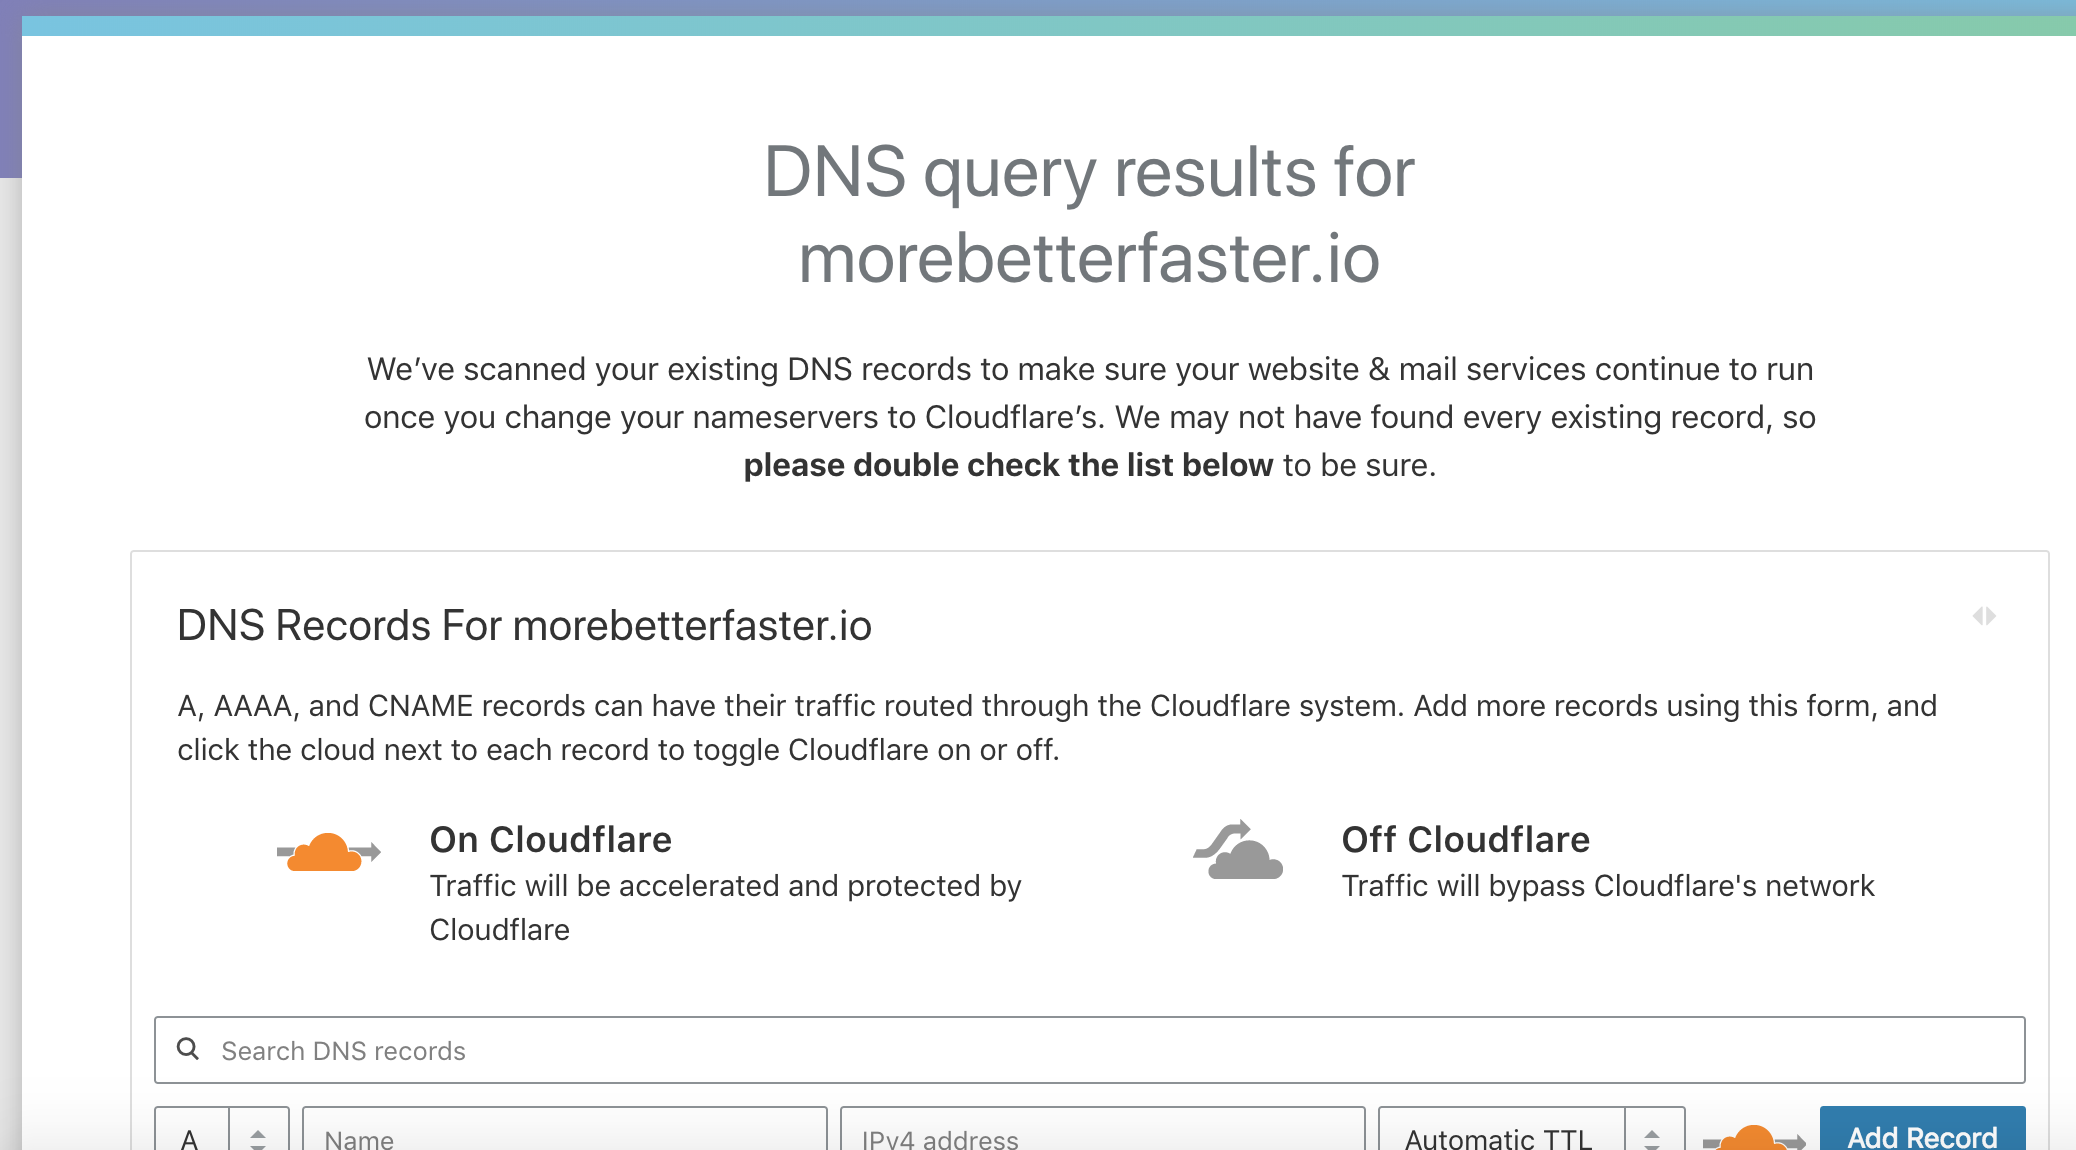
It’ll ask you to set up a plan and then confirm your existing DNS records. Basically, you’re going to change your DNS name servers to Cloudflare, so it’s attempting to bring over your records preemptively. Just agree to this.
Now, you’ll see your name servers.
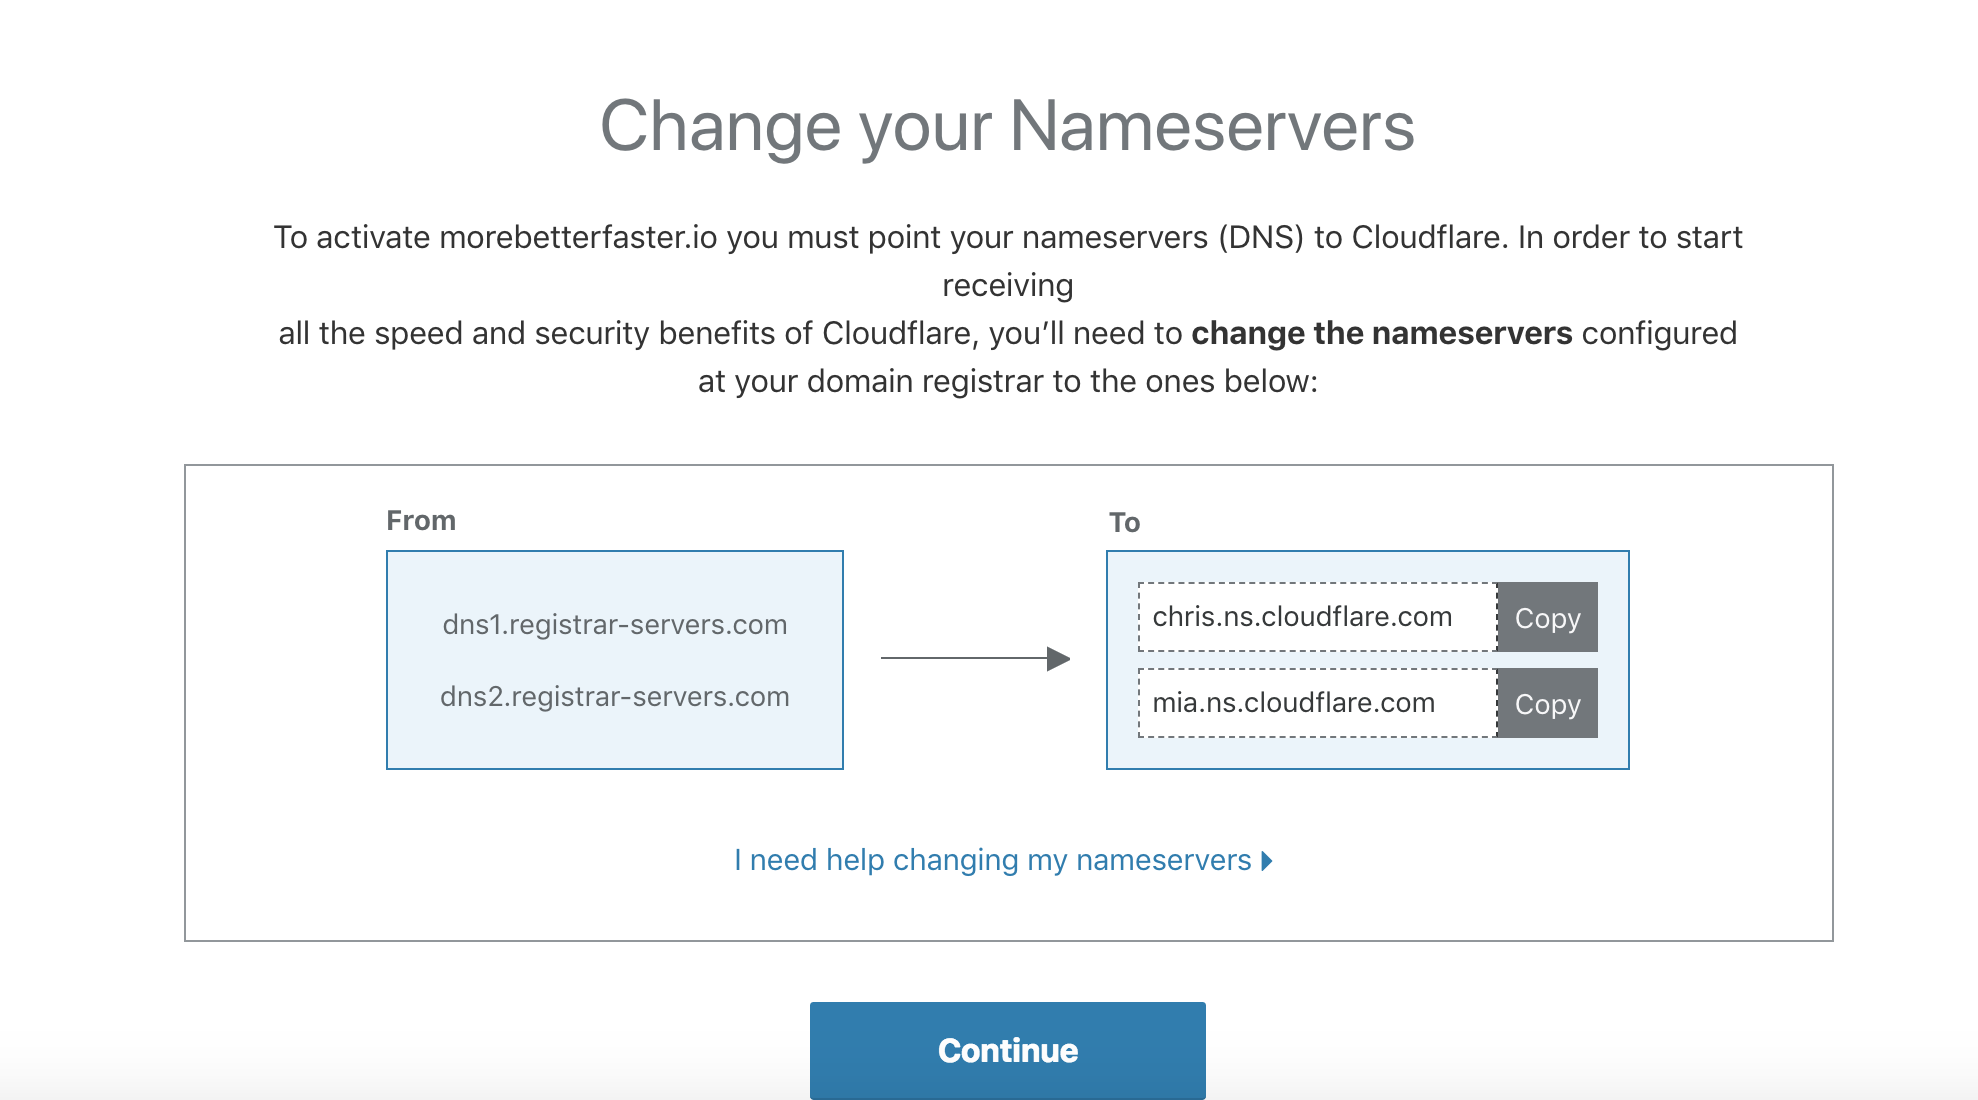
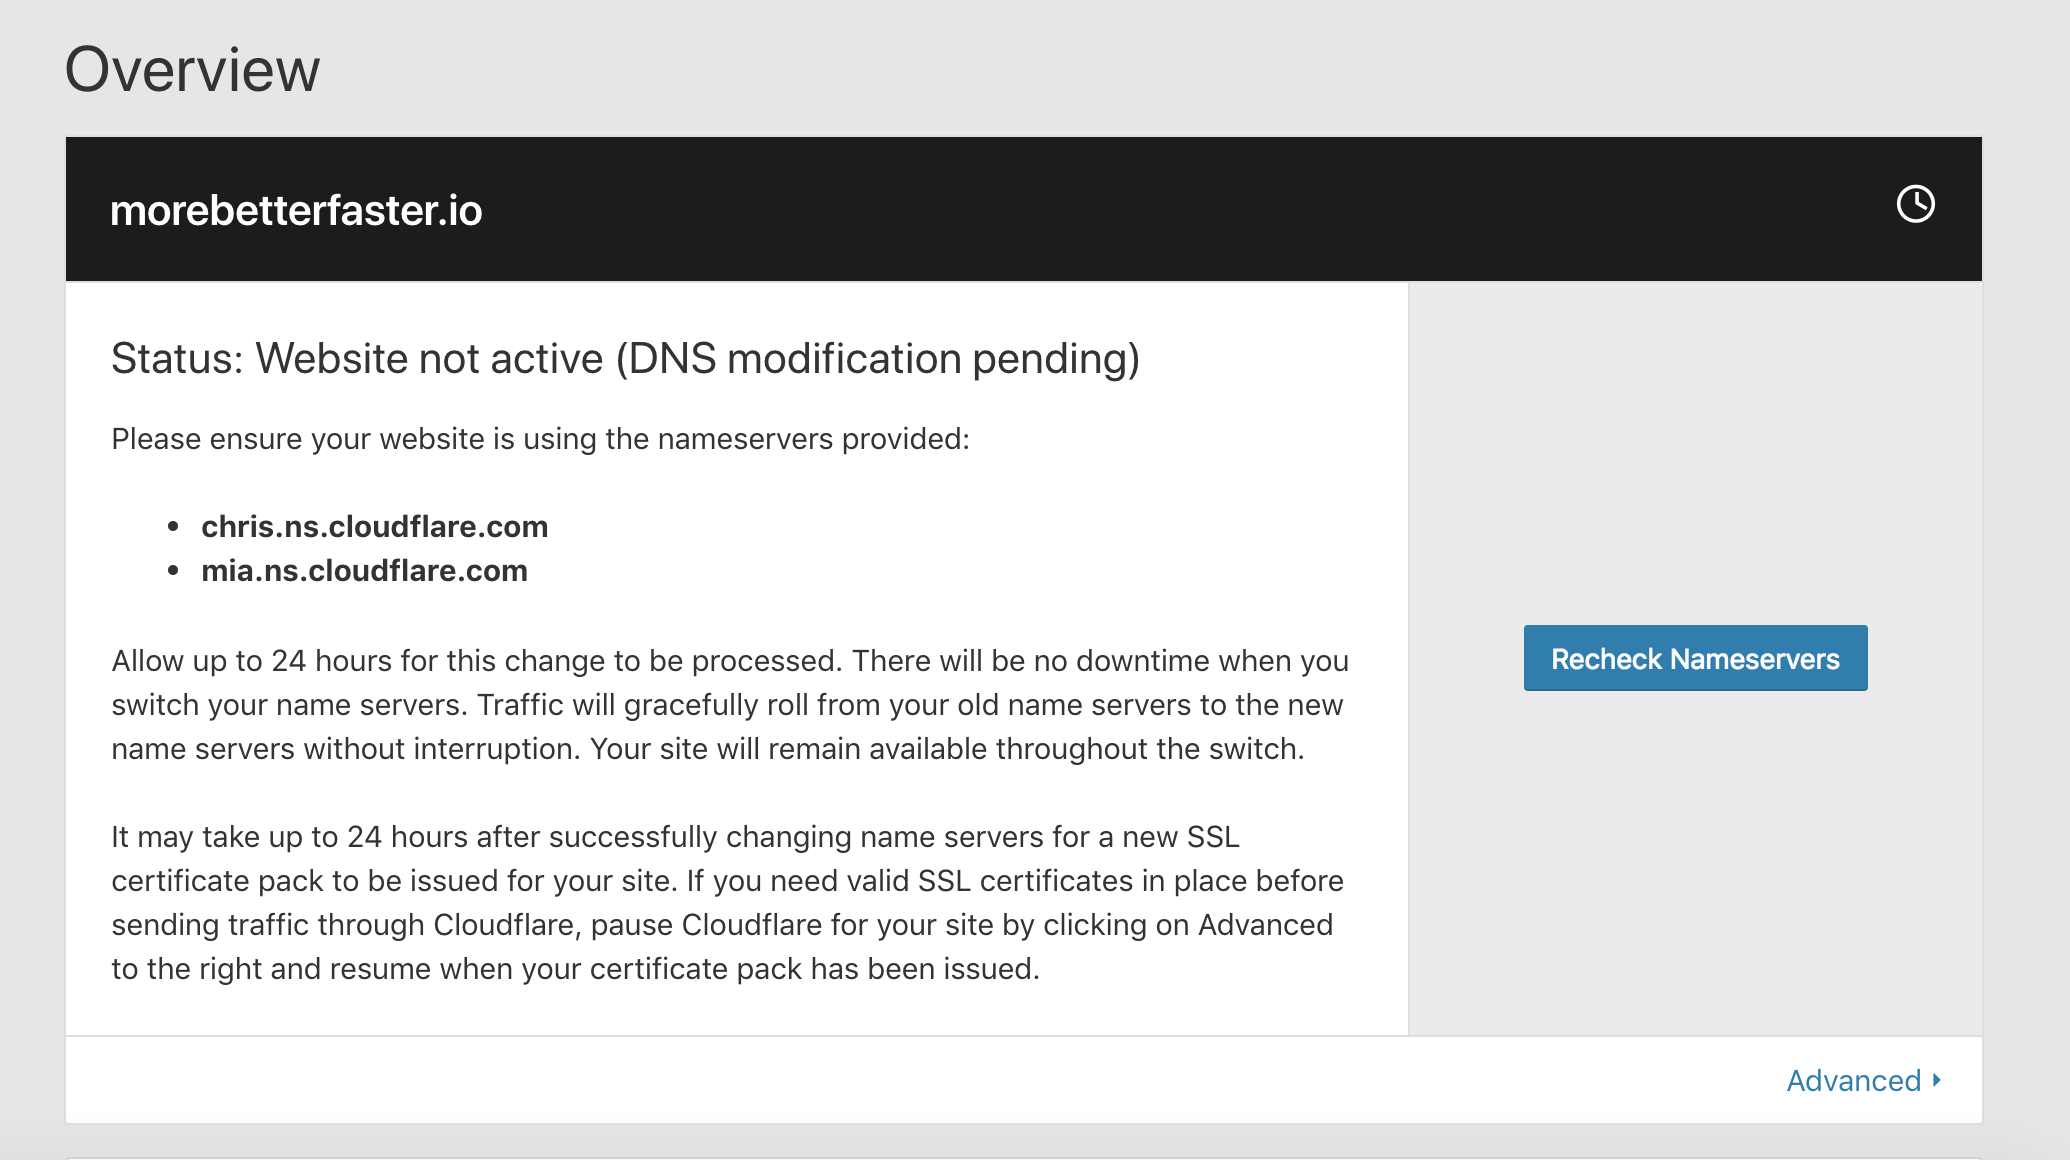
Time to go back to your registrar and change those. Please note that you have to get your name servers from Cloudflare, yours may not be the same as mine.
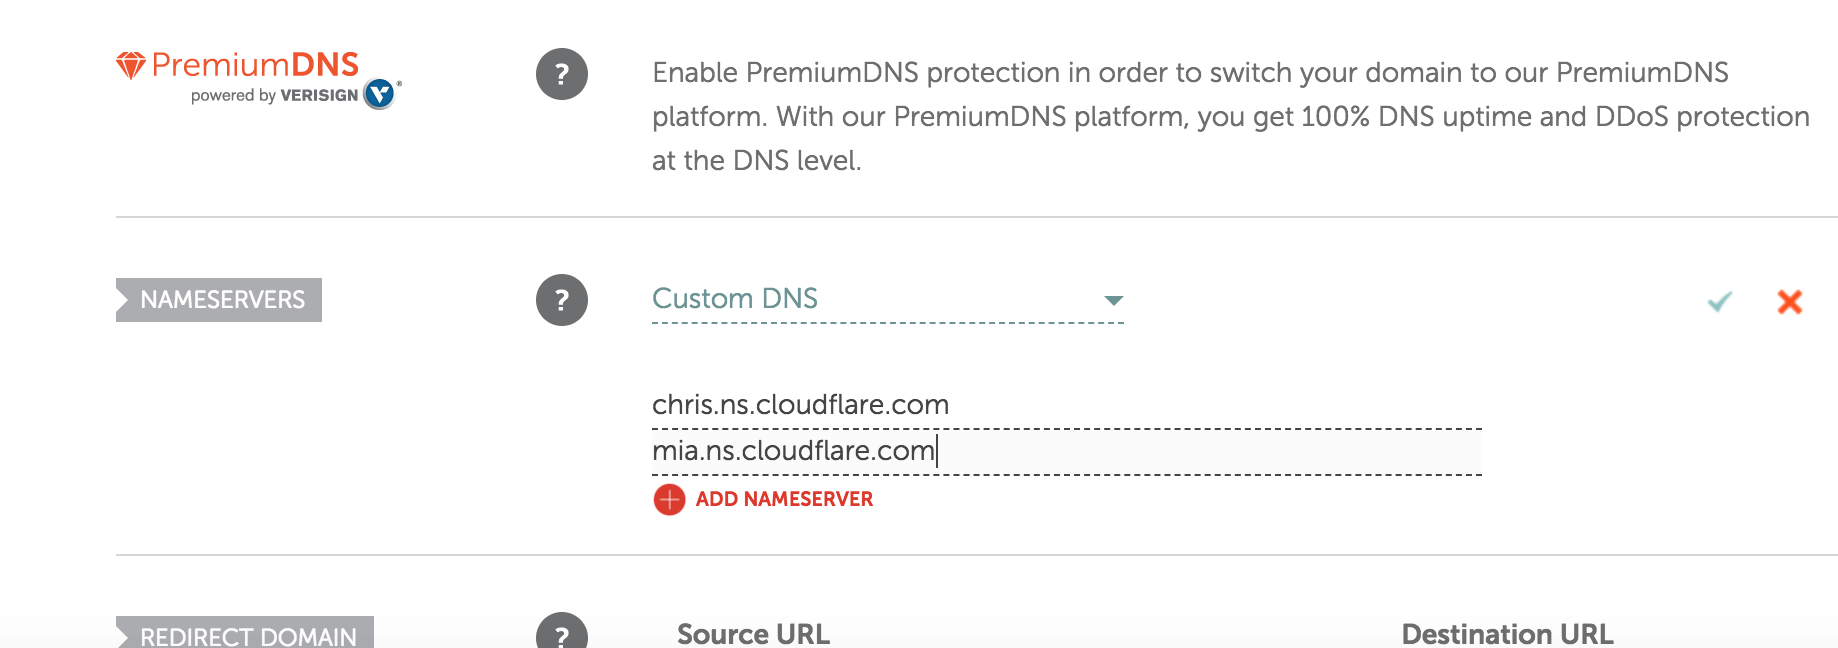
After this is complete, return to Cloudflare to finish everything up. Right off the bat, you’ll probably have to wait, but that’s ok. Just keep checking the nameservers. My experience is it only takes a few minutes to update. It could take 24 hours or more, though, depending on your configuration and registrar.
Create GitHub Organization and Site
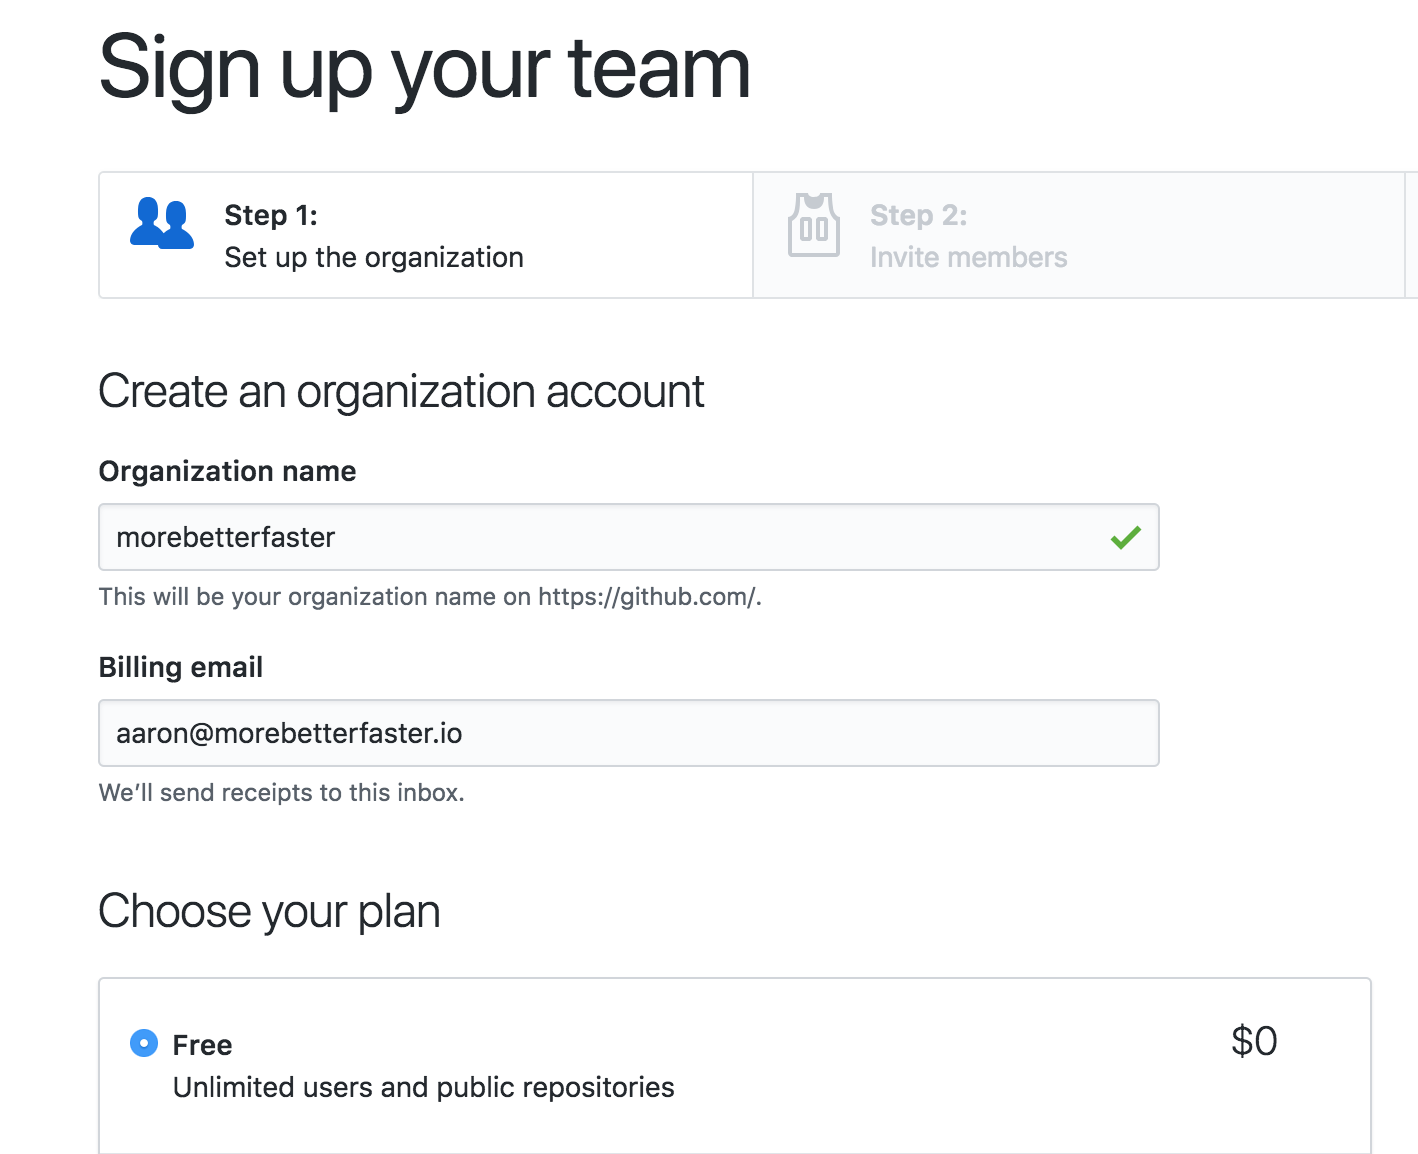
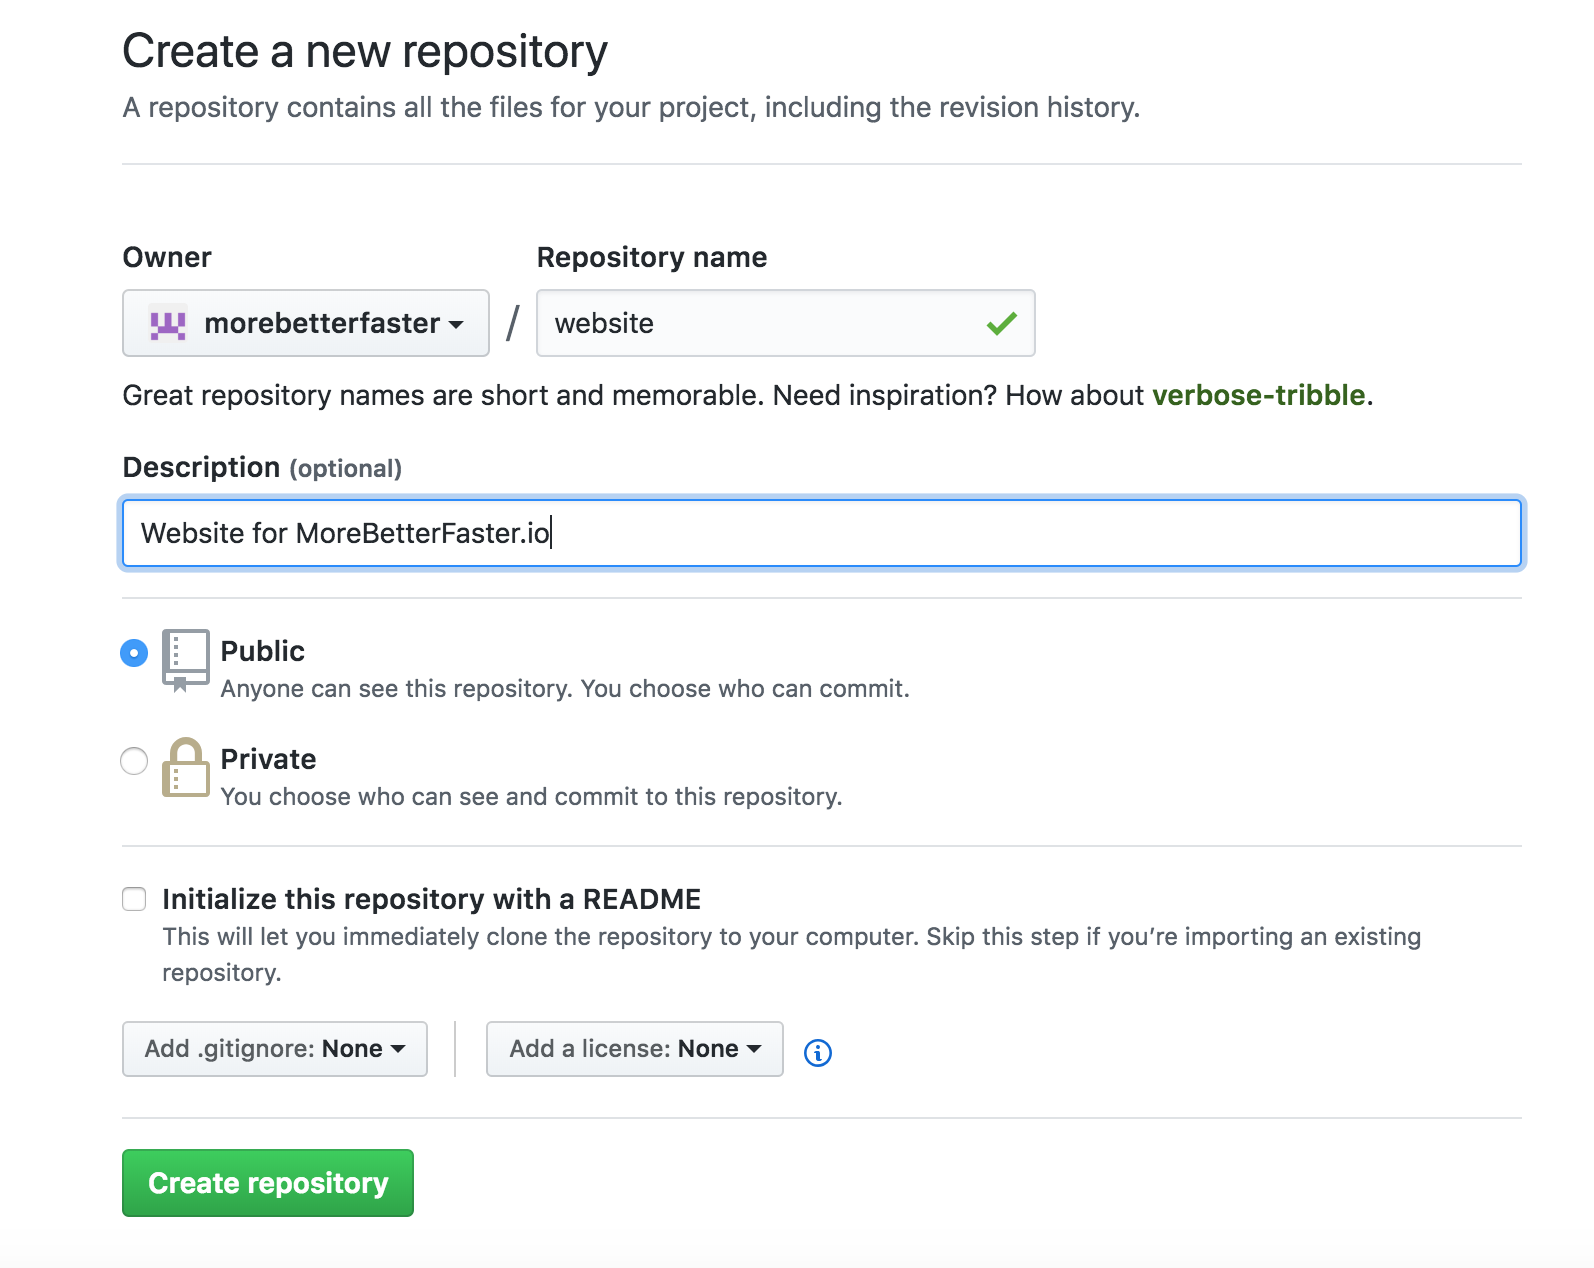
The next thing to do is set up an organization on GitHub. This is going to be where we’ll host our content for our site and what will build out our custom GitHub pages URL.
After the organization has been created, create a new repository and name it whatever you want.
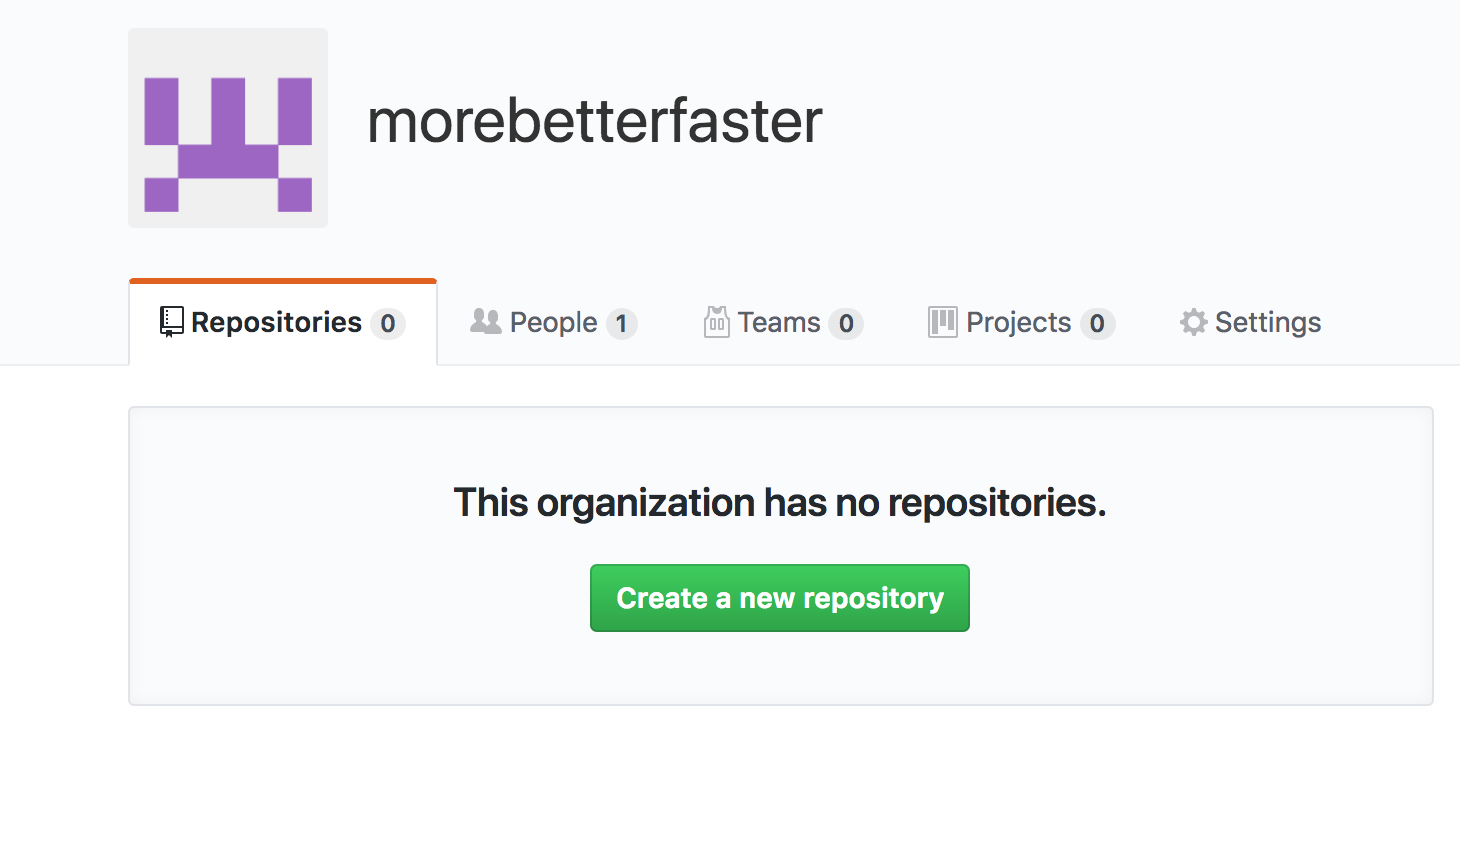
I’m going to name mine website.
Now that I’ve done that, it’s time to create my quick website locally. I’m just going to make a very simple website with the following file:
<!DOCTYPE html>
<html>
<head>
  <meta charset="utf-8" />
  <meta http-equiv="X-UA-Compatible" content="IE=edge">
  <title>More. Better. Faster.</title>
  <meta name="viewport" content="width=device-width, initial-scale=1">
  <style>
    body {
      font-family: -apple-system, BlinkMacSystemFont, 'Segoe UI', Roboto, Oxygen, Ubuntu, Cantarell, 'Open Sans', 'Helvetica Neue', sans-serif;
      background: #ffffff;
      color: #2b2b2b;
      margin: 0;
    }
    div {
      font-weight: bold;
      font-size: 3rem;
      display: flex;
      justify-content: center;
      align-items: center;
      height: 100vh;
    }
  </style>
</head>
<body>
  <div>
	More. Better. Faster.
  </div>
</body>
</html>
This simple page will just be our home page for now.
To handle our custom domain, we need to create a CNAME file in github so it doesn’t reset our domain. To do this, create a new file and put your custom url.
morebetterfaster.io
Now it’s time to initialize this page as our git repo and push it. These instructions come directly from GitHub.
git init
git add dist/index.html
git add dist/CNAME
git commit -m "first commit"
git remote add origin [email protected]:morebetterfaster/website.git
git push -u origin master
Finally, I’m going to use GitHub Pages NPM package to publish my site.
To do this, I’ve done the following:
npm init -y
npm install gh-pages
echo "node_modules/" > .gitignore
git add .gitignore
git add package.json
git add package-lock.json
git commit -m "adding github pages"
git push origin master
First, this will initialize an npm project. Then, you install github pages. That will create a node_modules directory which you want to ignore in your git commits, hence the next line. Add the files, commit and push. You’re almost there.
The last thing we want to do is edit the package.json file to make it easier for us to push our github pages out. You’ll need to add the following under the scripts section:
"deploy": "gh-pages -d dist"
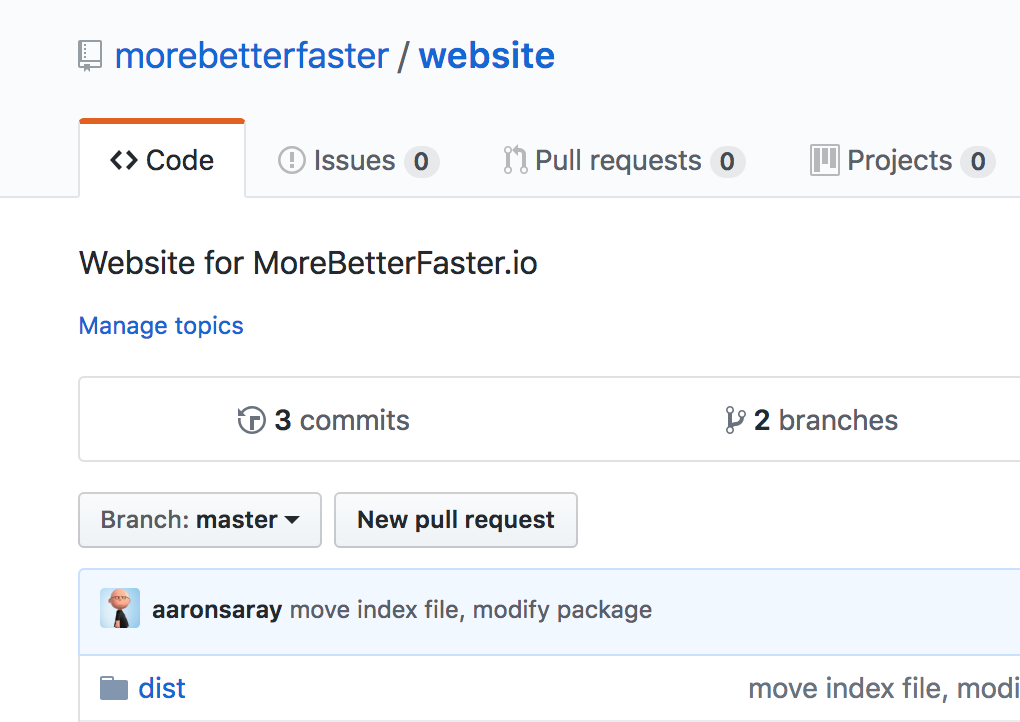
Now, you can run npm run deploy and it’ll push to the github pages branch and set everything up for you. The first indication this is all set up properly is the fact that you have 2 branches, one of them is gh-pages.
You can also see that on the settings page.
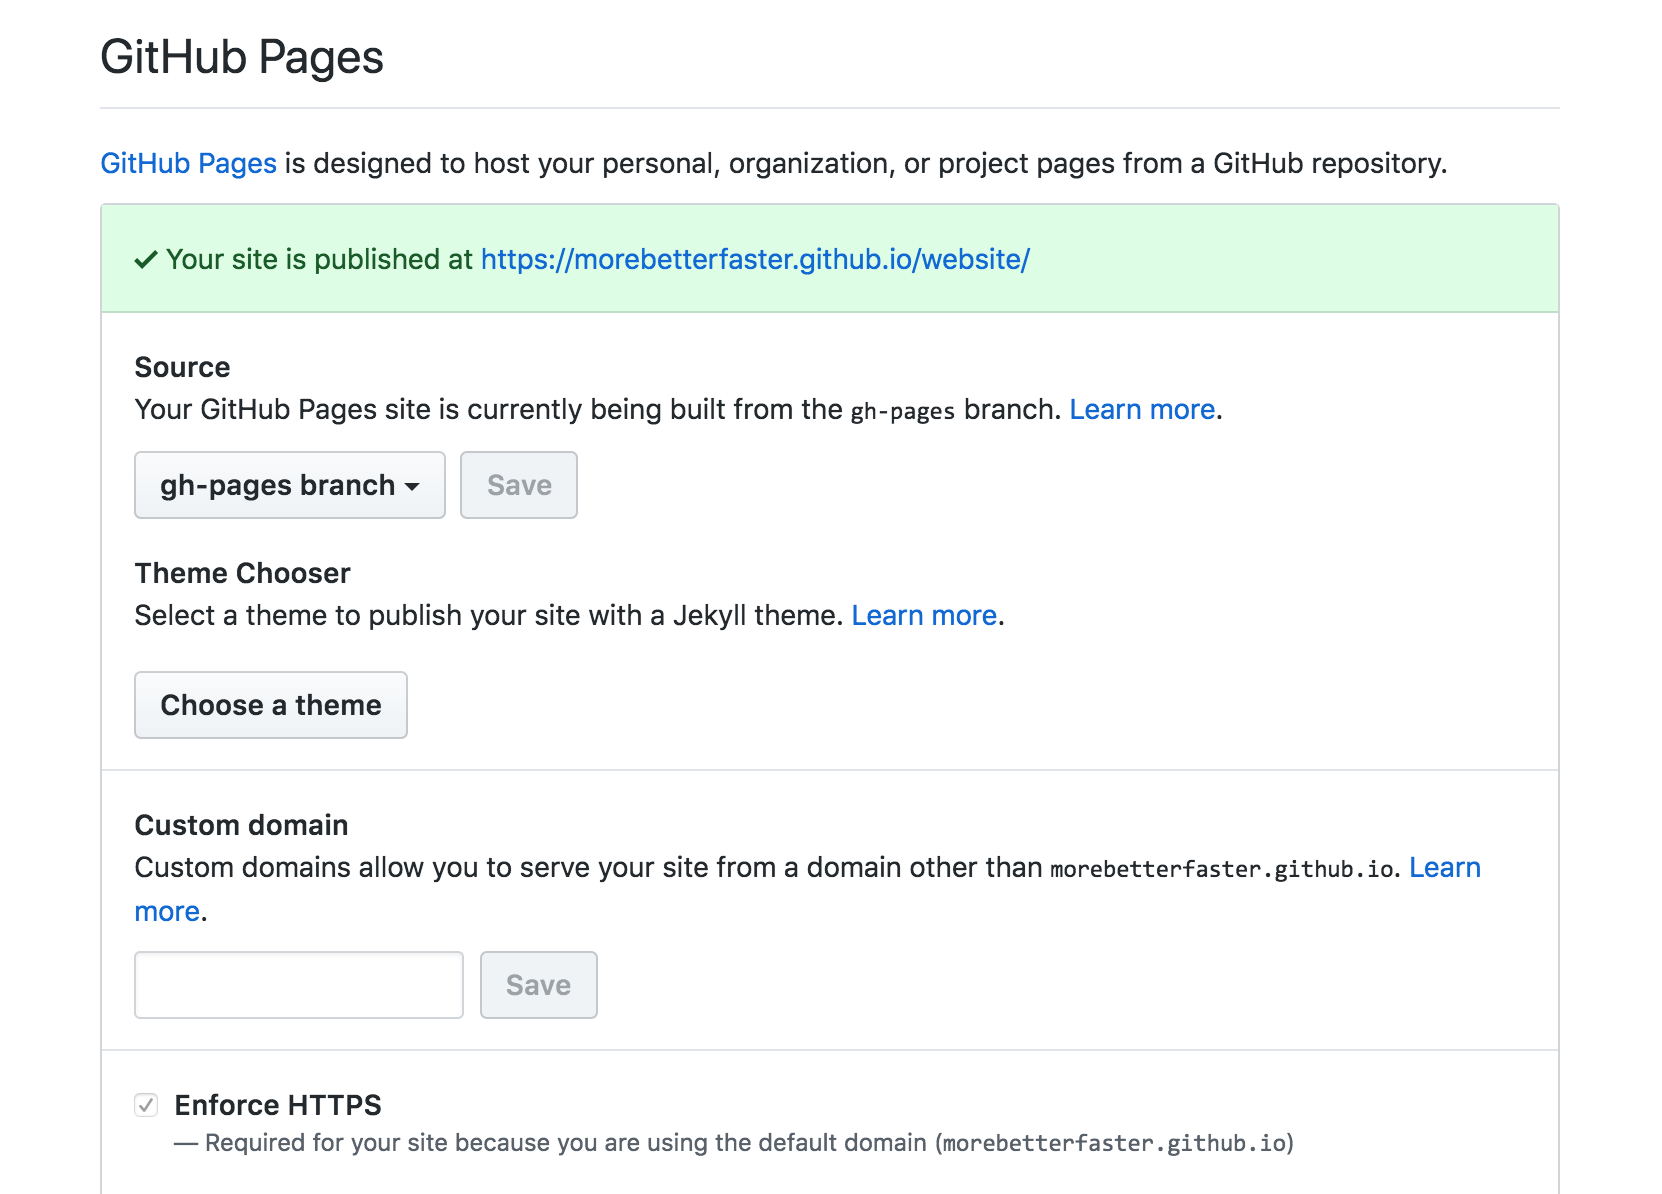
Now, you can change it to your custom domain as seen below.
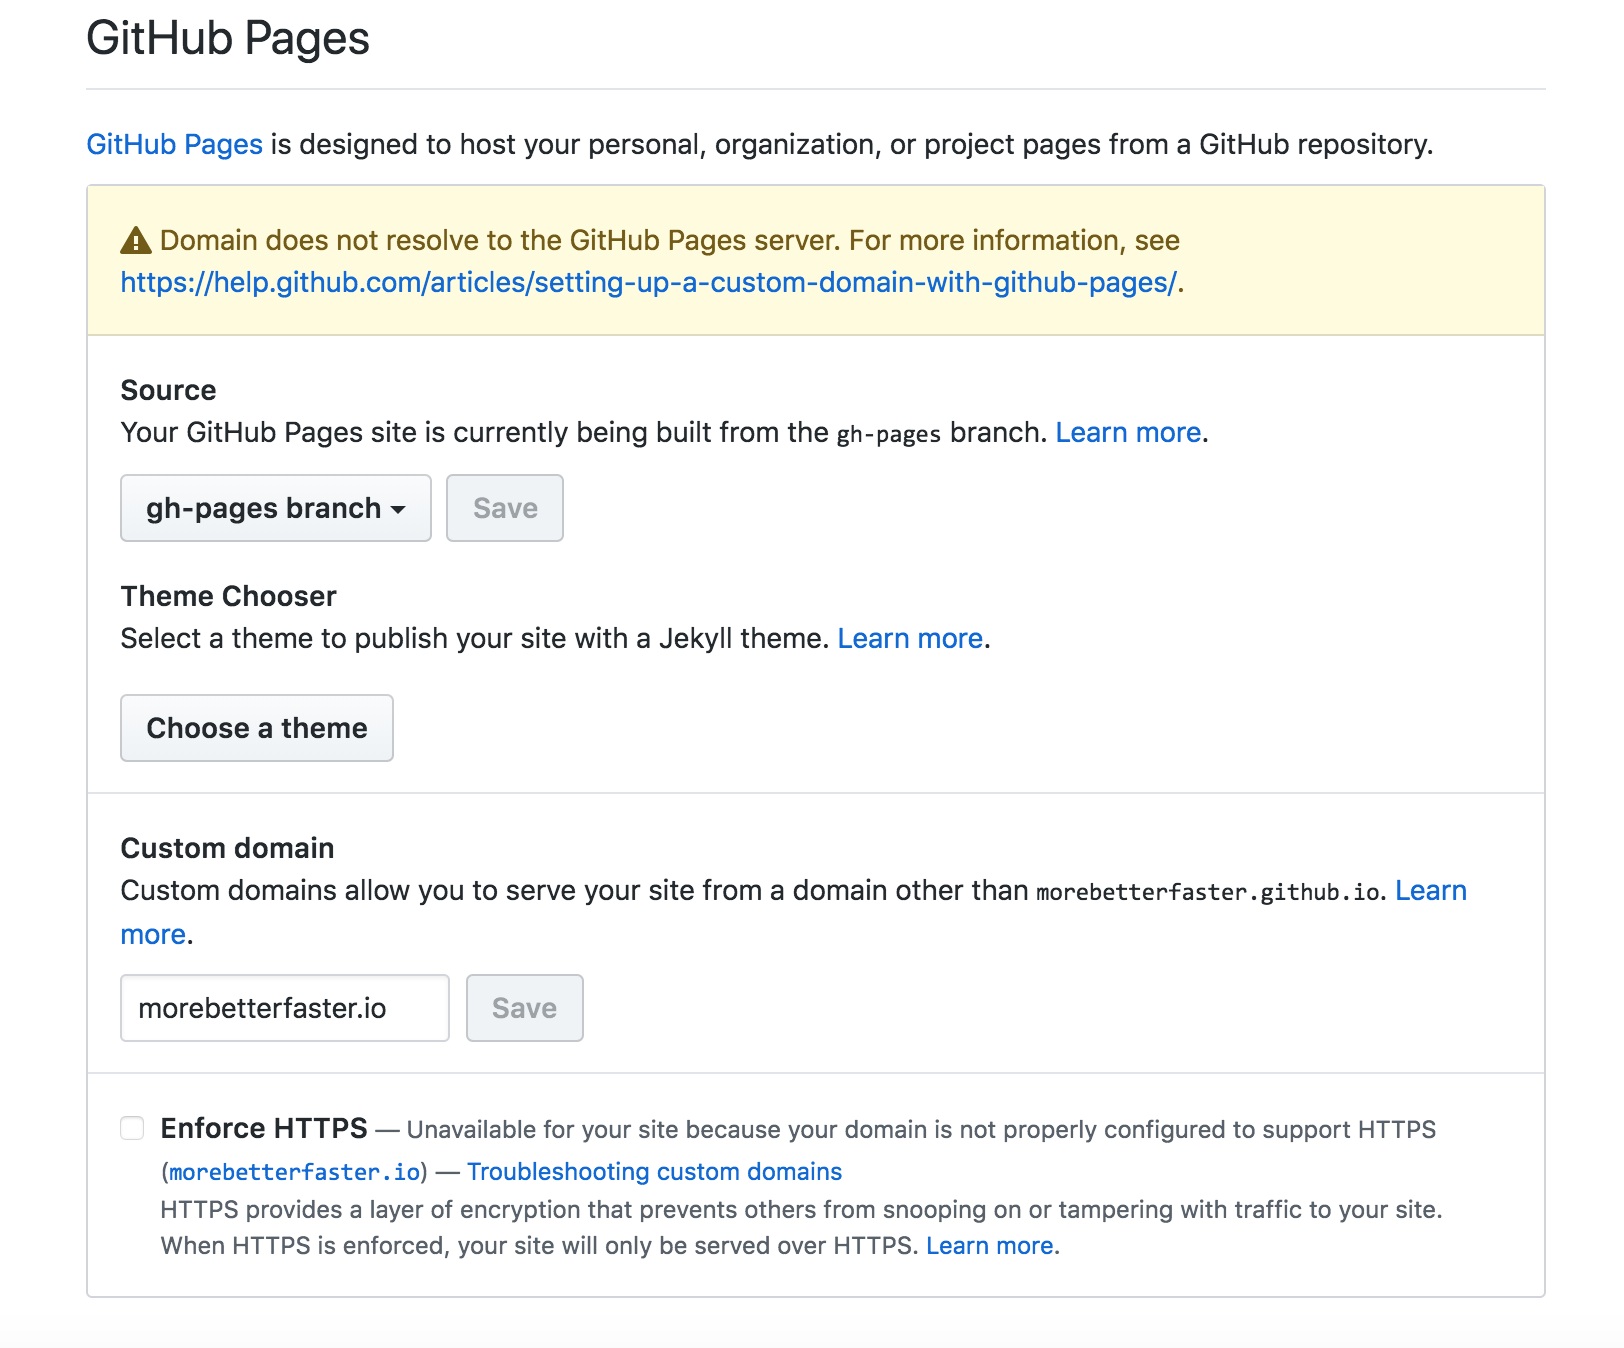
First of all, ignore the warning above. That’s fine. We’re going to be handling that with our Cloudflare configuration. Second, do not check the enforce HTTPS part yet. We’re going to set that up at cloudflare.
More Cloudflare Configuration
Now, we have GitHub all set up, we have our domain managed by Cloudflare. It’s time to connect the dots.
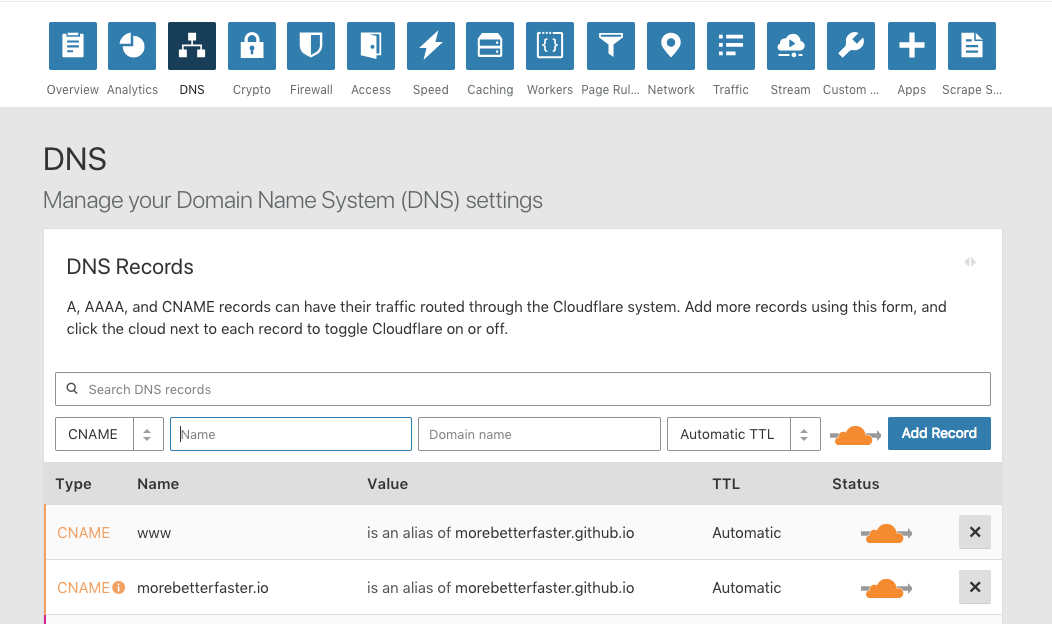
First, let’s do some CNAME flatting and adding aliases in Cloudflare.
Add a cname for your domain that is an alias of github and for the www. Do not point this to your custom domain, just to the github one.
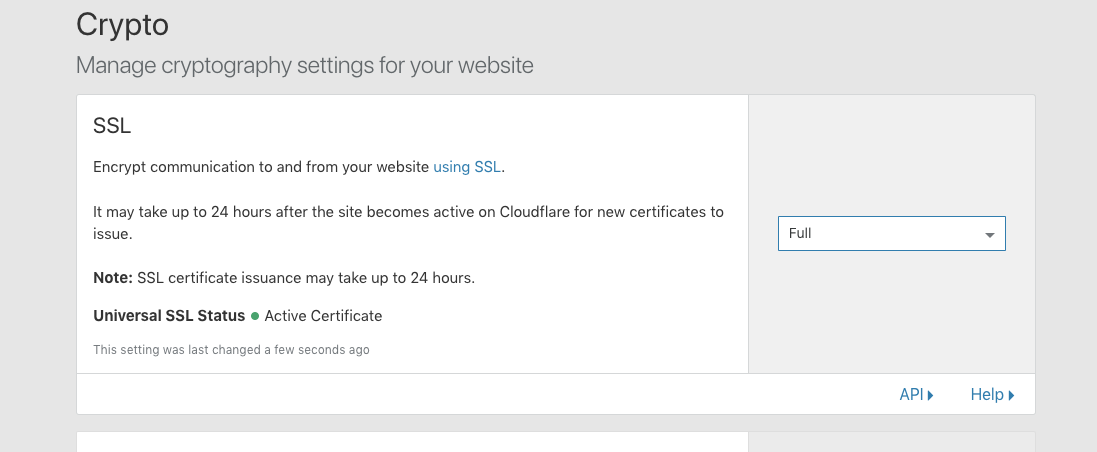
Next, it’s time to configure SSL. Click the Crypto tab and make the ssl a full ssl (don’t use strict). You might have to wait for your certificate if its not already there.
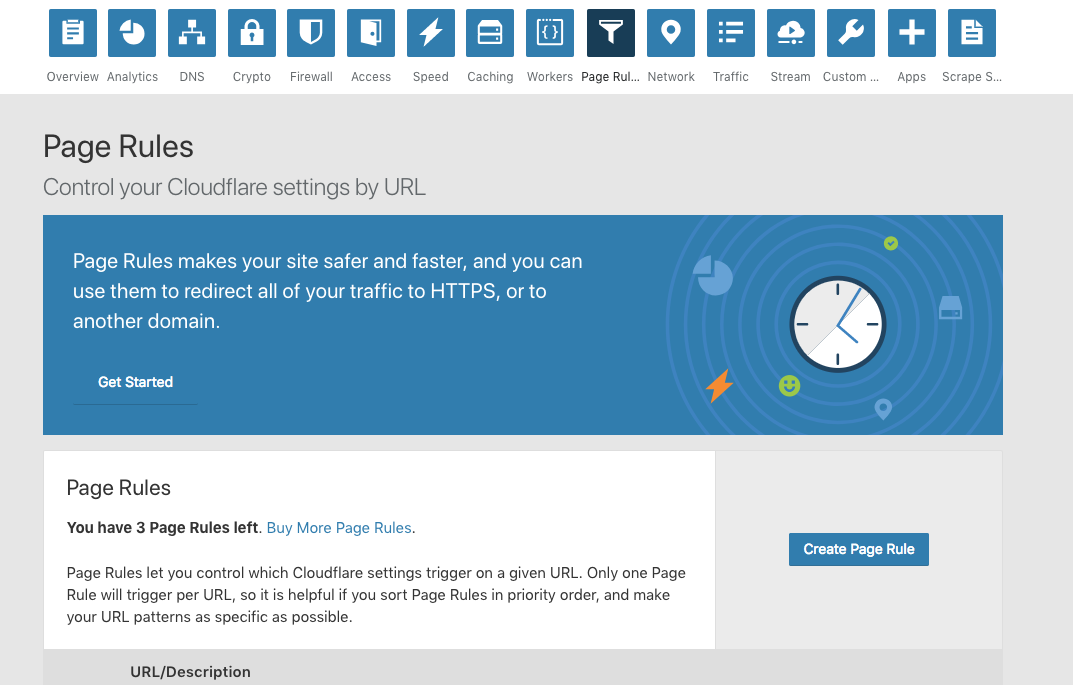
Now, click the Page Rule tab to add rules to force https.
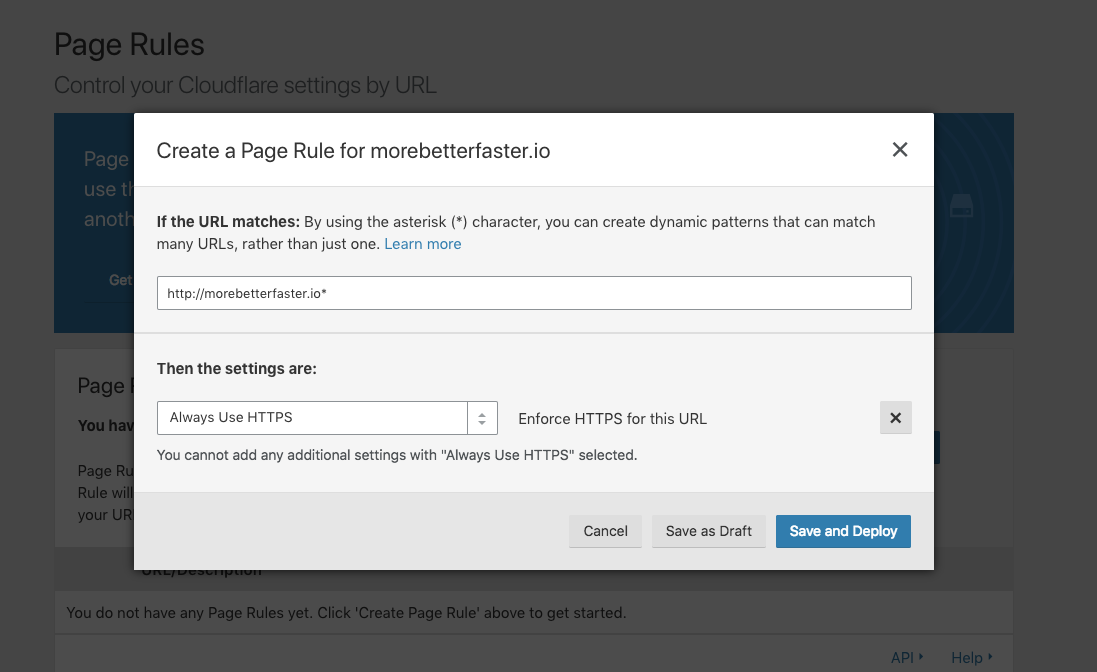
Use the non-ssl version of the website with a asterisk and add a rule to always use HTTPS. Then click save and deploy.
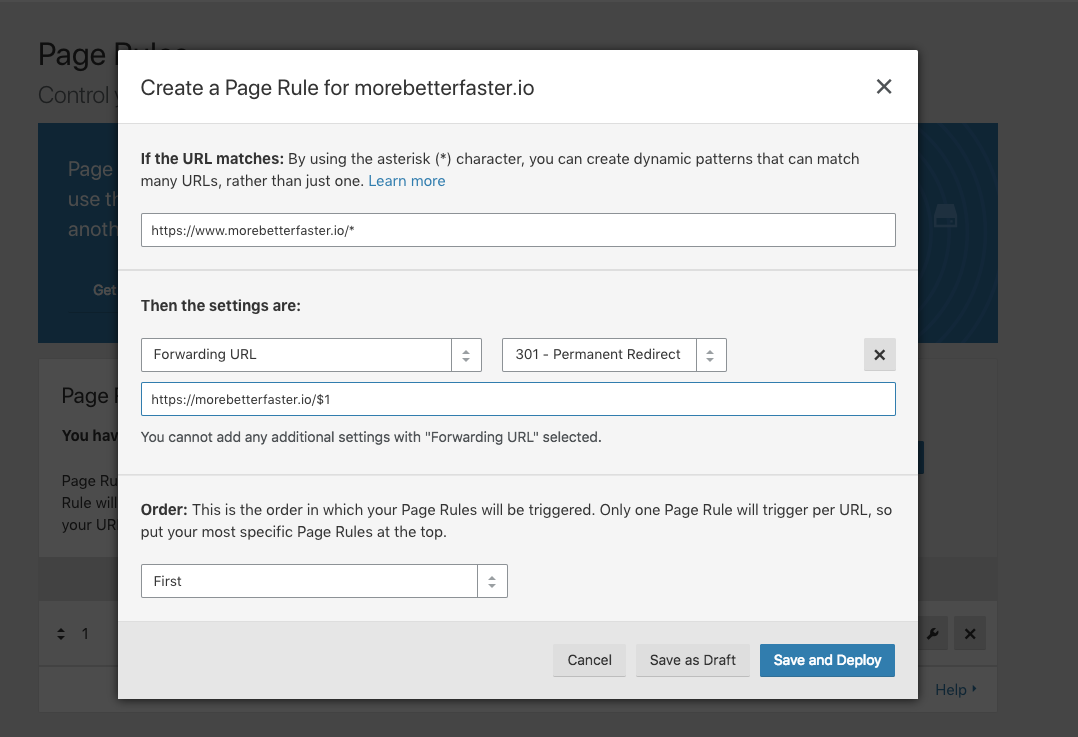
Then, we can redirect www to non www by adding another rule.
And that should be it.